SSO
SSO - OpenID Connect (Okta Example)
SSO Setup with Okta (or similar) using OIDC
Thank you for your interest in setting up SSO with Reforge Insights via Okta using OIDC. This guide will walk you through the setup process and help you collect the information needed to provide back to us. If you have any questions along the way, please reach out to your primary point of contact with our team.
Prerequisites
Before beginning the setup process, you will need the following information from your Reforge Insights team:- Sign-in redirect URI (will be provided by your point of contact)
- Sign-out redirect URI (will be provided by your point of contact)
Setup Instructions
-
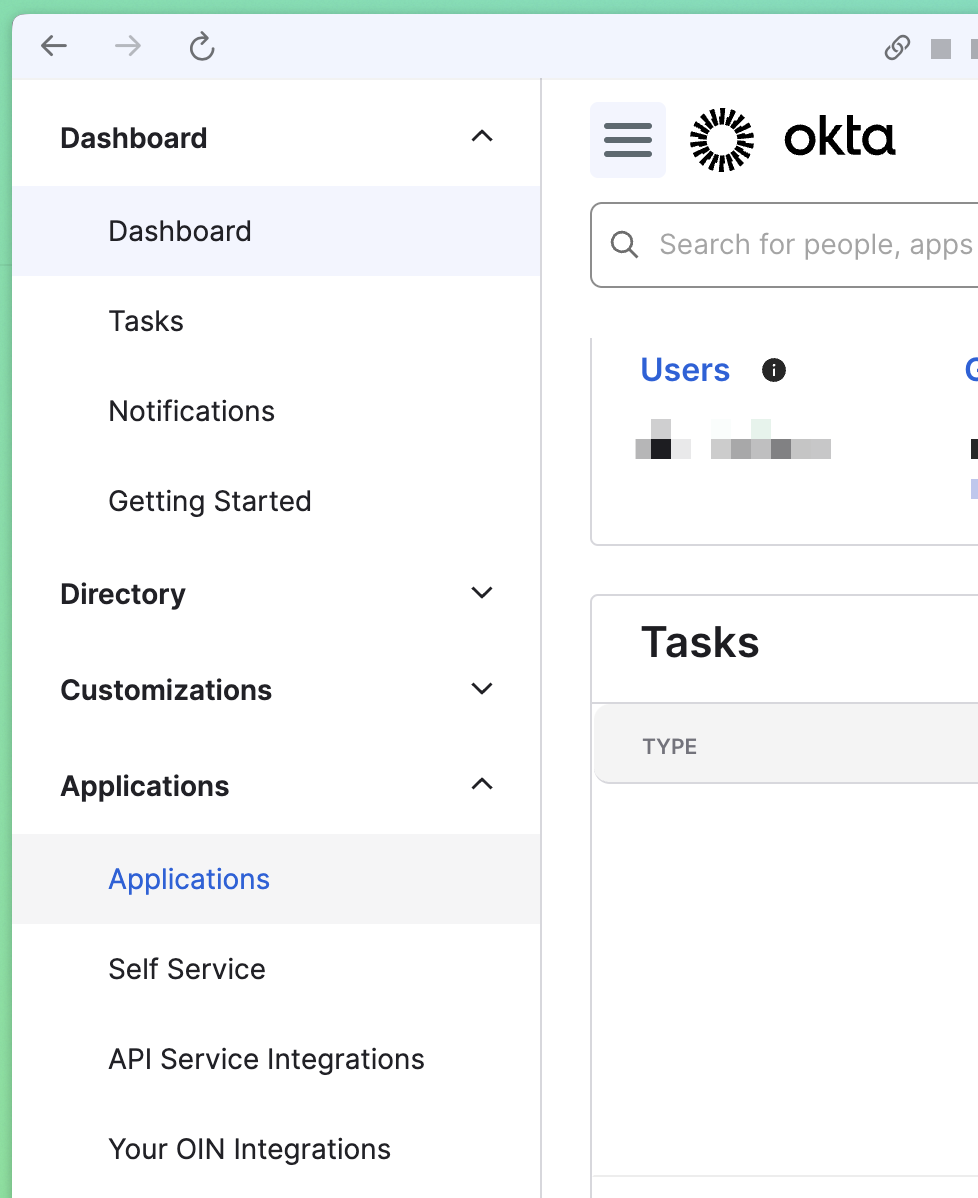
Open the left-nav bar and navigate to “Applications” (inside “Applications” section)

-
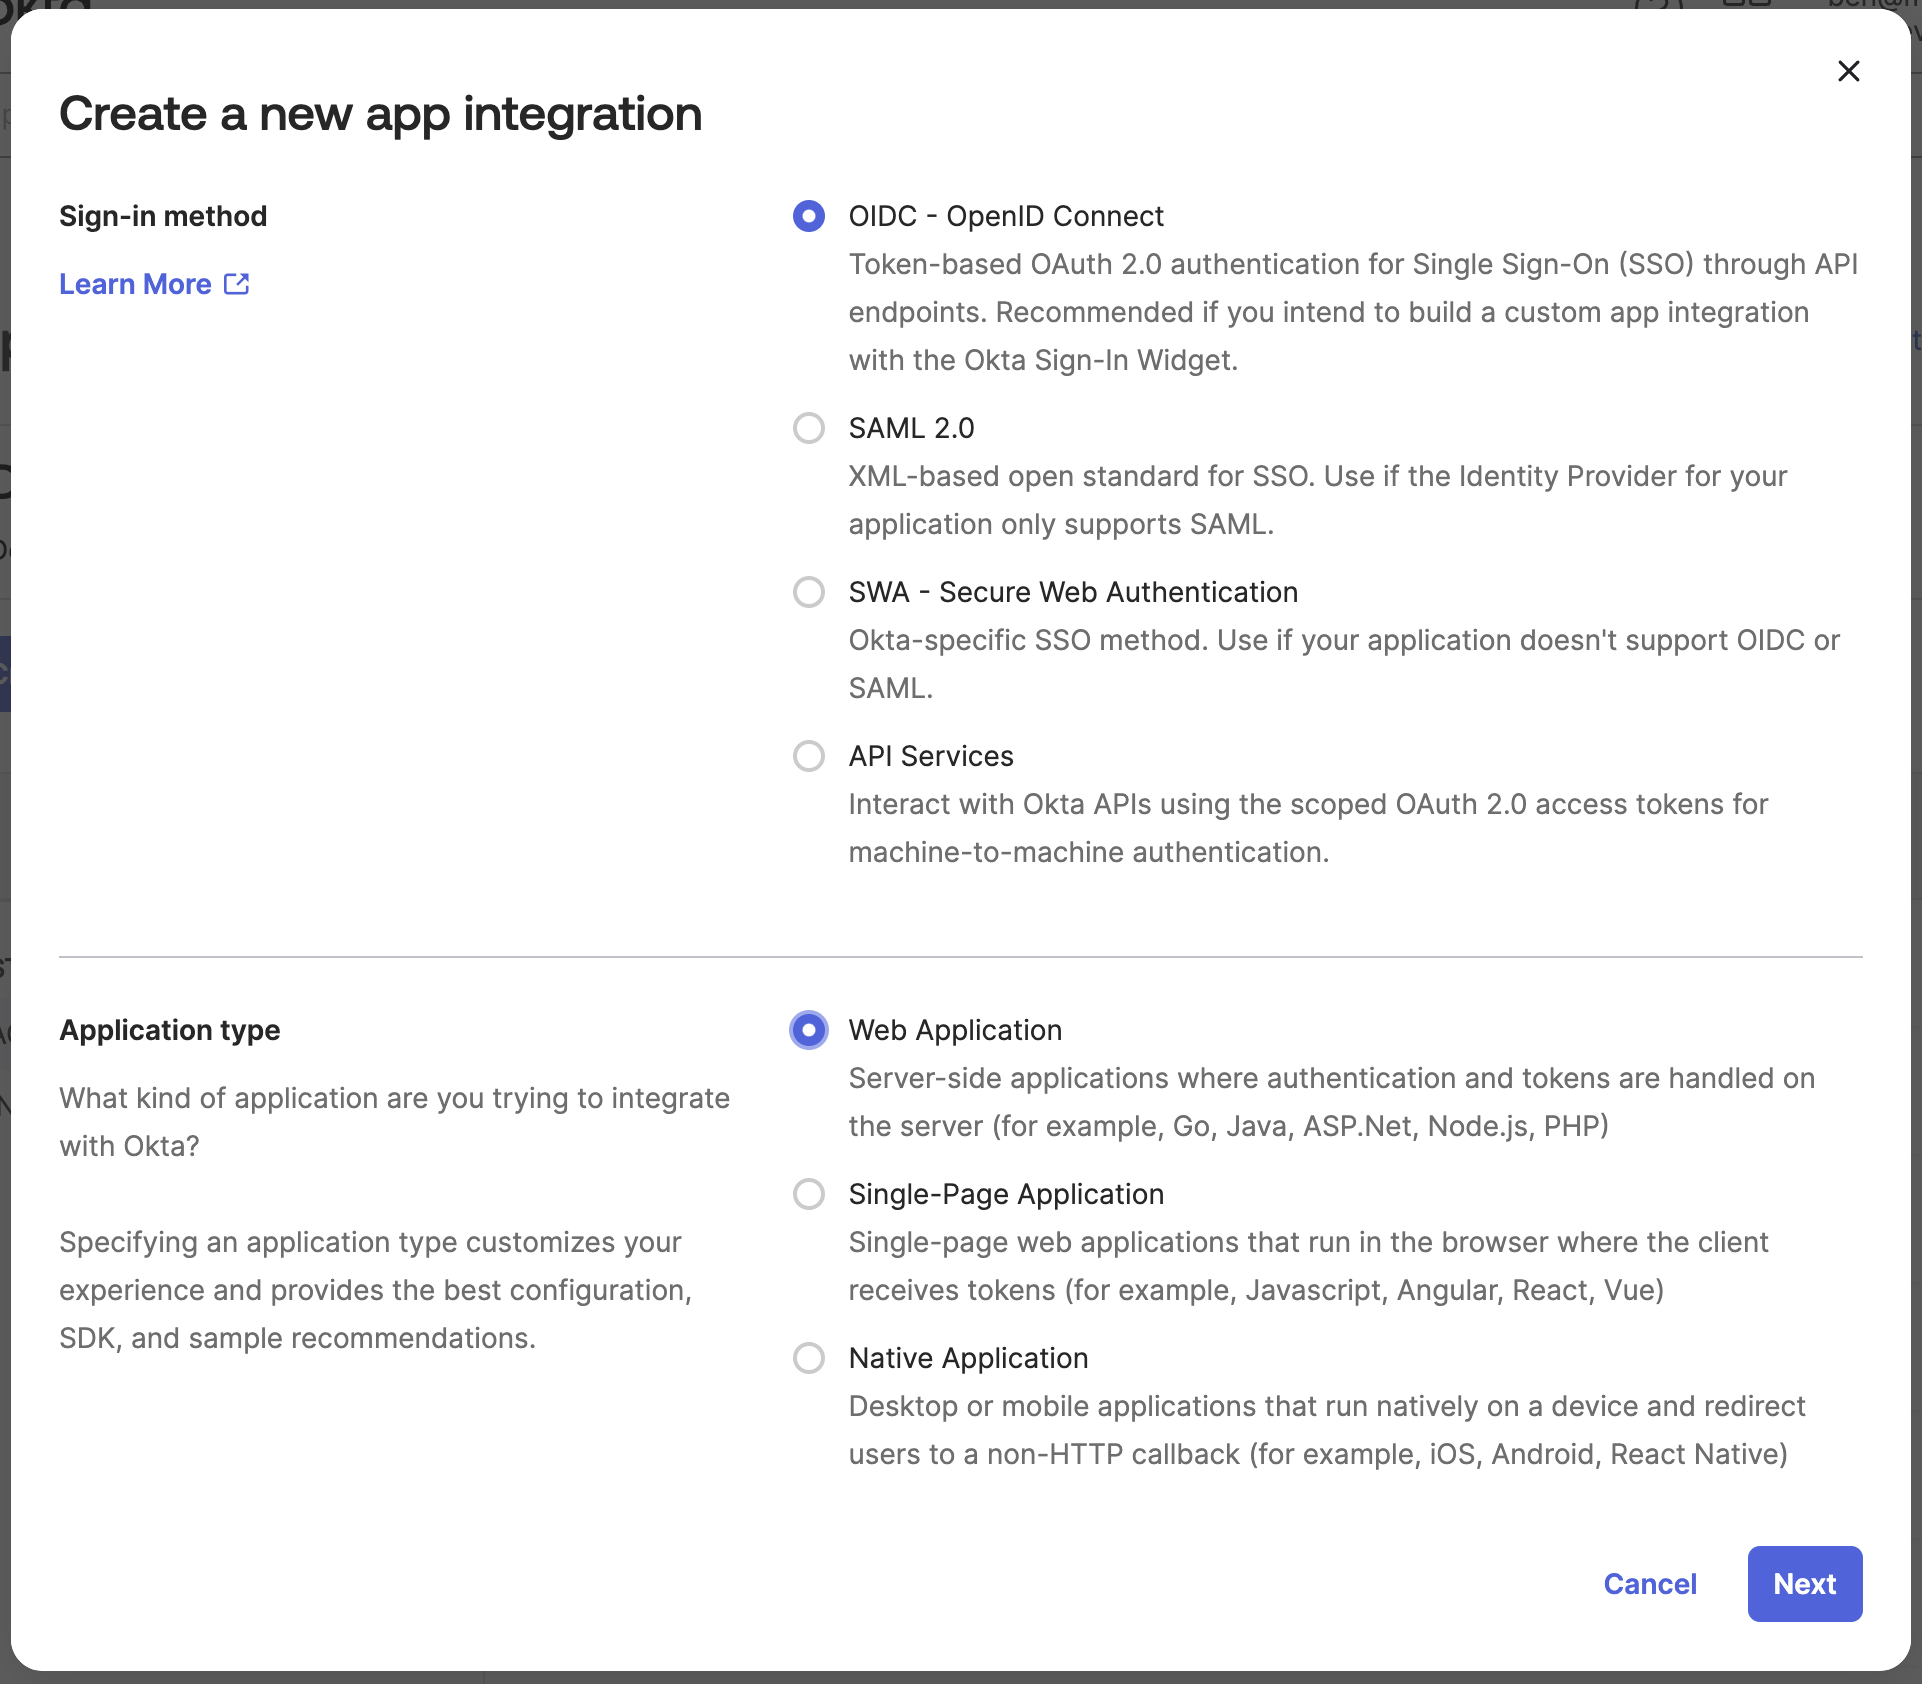
Click “Create App Integration”
- For Sign-in method, choose “OIDC - OpenID Connect”
-
For Application type, choose “Web Application”

-
Configure General Settings
- You can name the app as you’d like, we suggest “Reforge Insights”
- You can download a logo to provide here: [link to logo]
- Other settings can be left empty or default values
-
Configure Sign-in redirect URIs
- Enter the sign-in redirect URI provided by your Reforge Insights team
- Do not check the box for _Allow wildcard _ in sign-in URI redirect.*
-
Configure Sign-out redirect URIs
- Enter the sign-out redirect URI provided by your Reforge Insights team
-
Assignments
- This can be configured to your preferences based on who should have access to Reforge Insights.
- Finally, click “Save” at the bottom of the page.
-
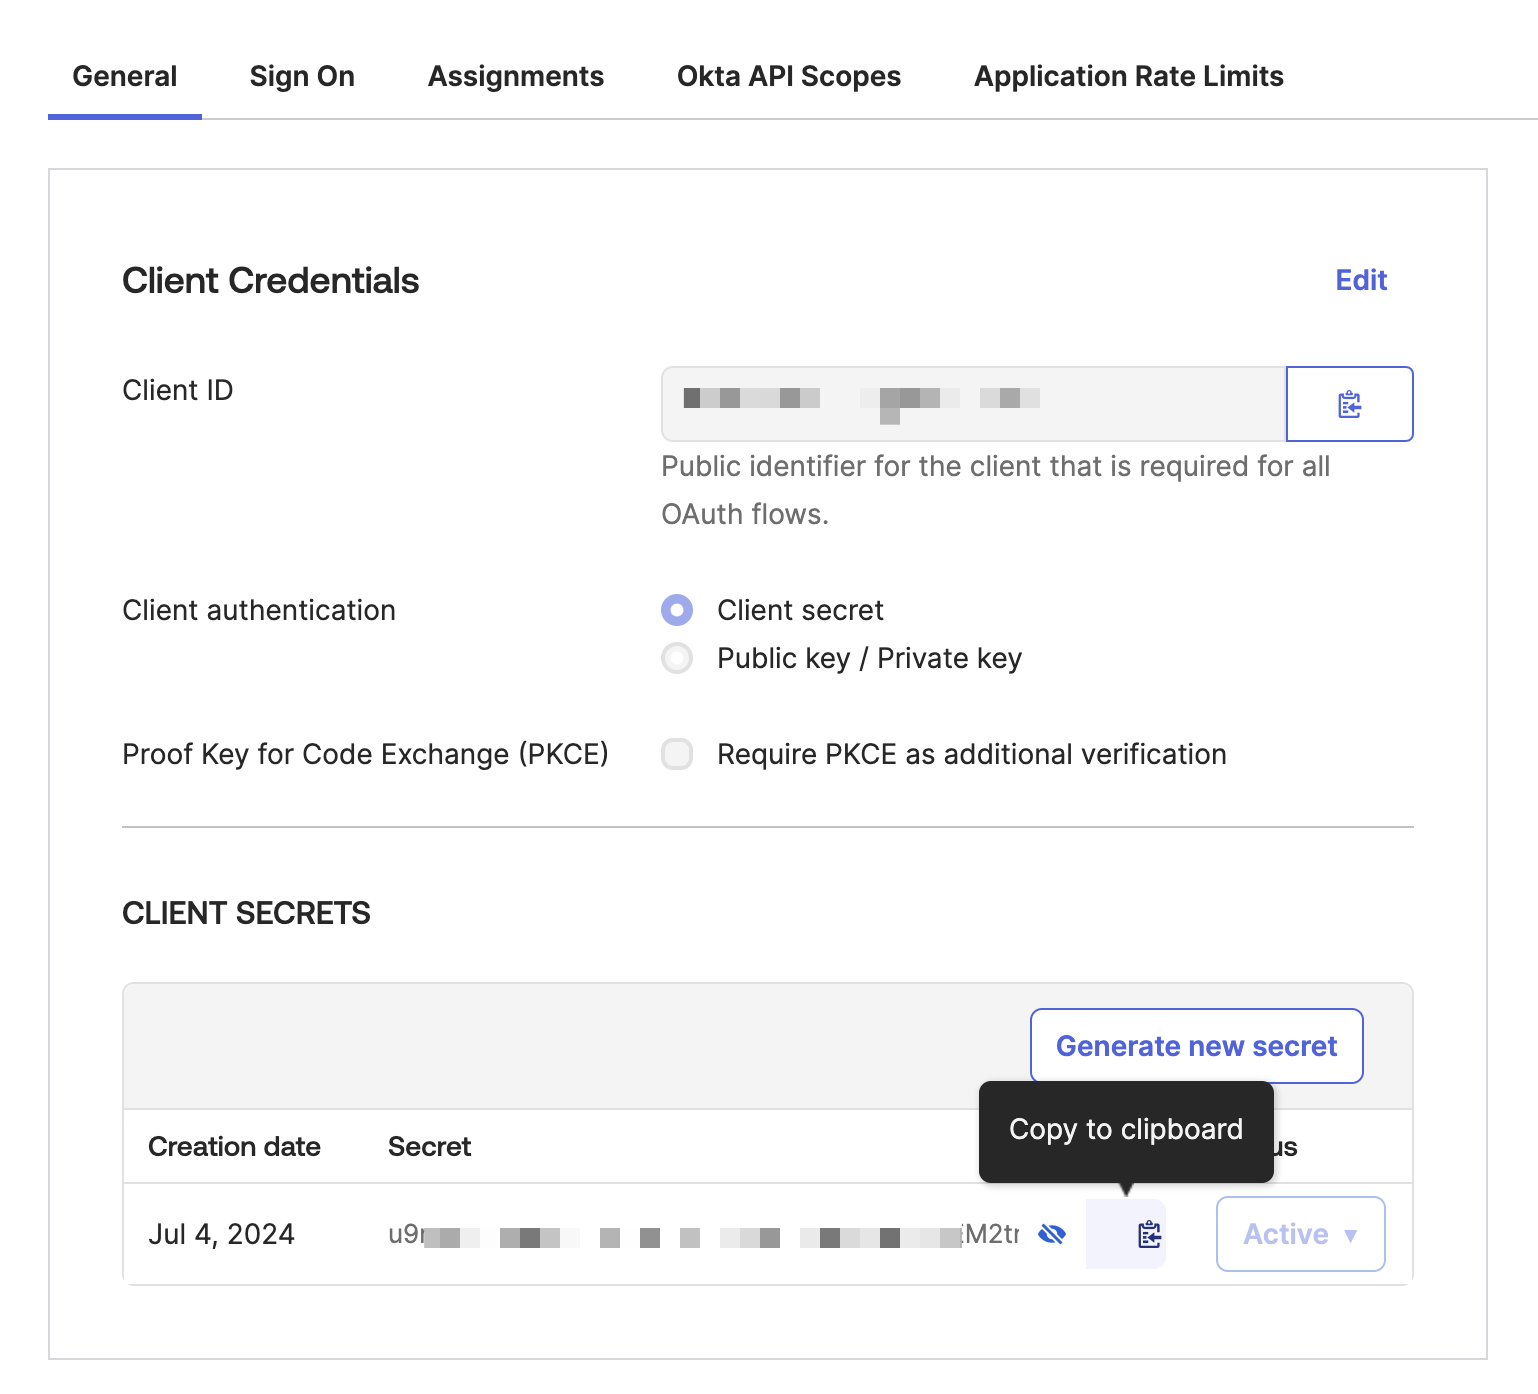
On the resulting page, collect the following details:
- Client ID
-
Client Secret

-
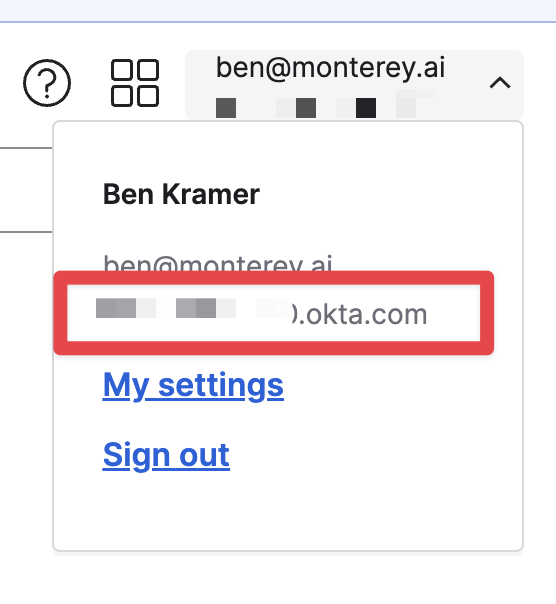
Your Okta Domain is not on this page, but would look something like
https://company.okta.com. It can be found by clicking your profile in the top right, and copying the value from the information displayed.
-
Share details with your point of contact at Reforge Insights
- We suggest using secure methods, like temporary credentials through 1password, or other secure document sharing means in place with your organization.
- The final set of details that need shared:
- Client ID
- Client Secret
- Okta domain
- Email domain(s) users in your organization have that will access Reforge Insights e.g.
@monterey.aior@company.com

