Overview
Project areas and tags are workspace-defined labels that help triage feedback snippets. When auto-triage is enabled for a particular label, Reforge Insights will go ahead and auto assign a project area label when the feedback is ingested or the labels are backfilled, provided our AI models are confident in that prediction. While project area labels and tag labels work functionally similar in downstream uses (filtering, chat, reports, etc.), they have one key difference that necessitates the separation of the two. For a particular snippet when auto-triage is enabled:- 0 or 1 project areas can be auto-assigned
- 0 or many tag areas can be auto-assigned
Creating and Updating Labels
To create or update labels, navigate to the Labels tab in the “Project Areas” or “Tags” page, where you will see a list of all existing labels. When creating or updating a new label, you will be provided with a two page modal:- First, a form input for entering the labels name, description and auto-triage enablement.
- Second, a select few snippets to optionally give positive or negative label assignments too.
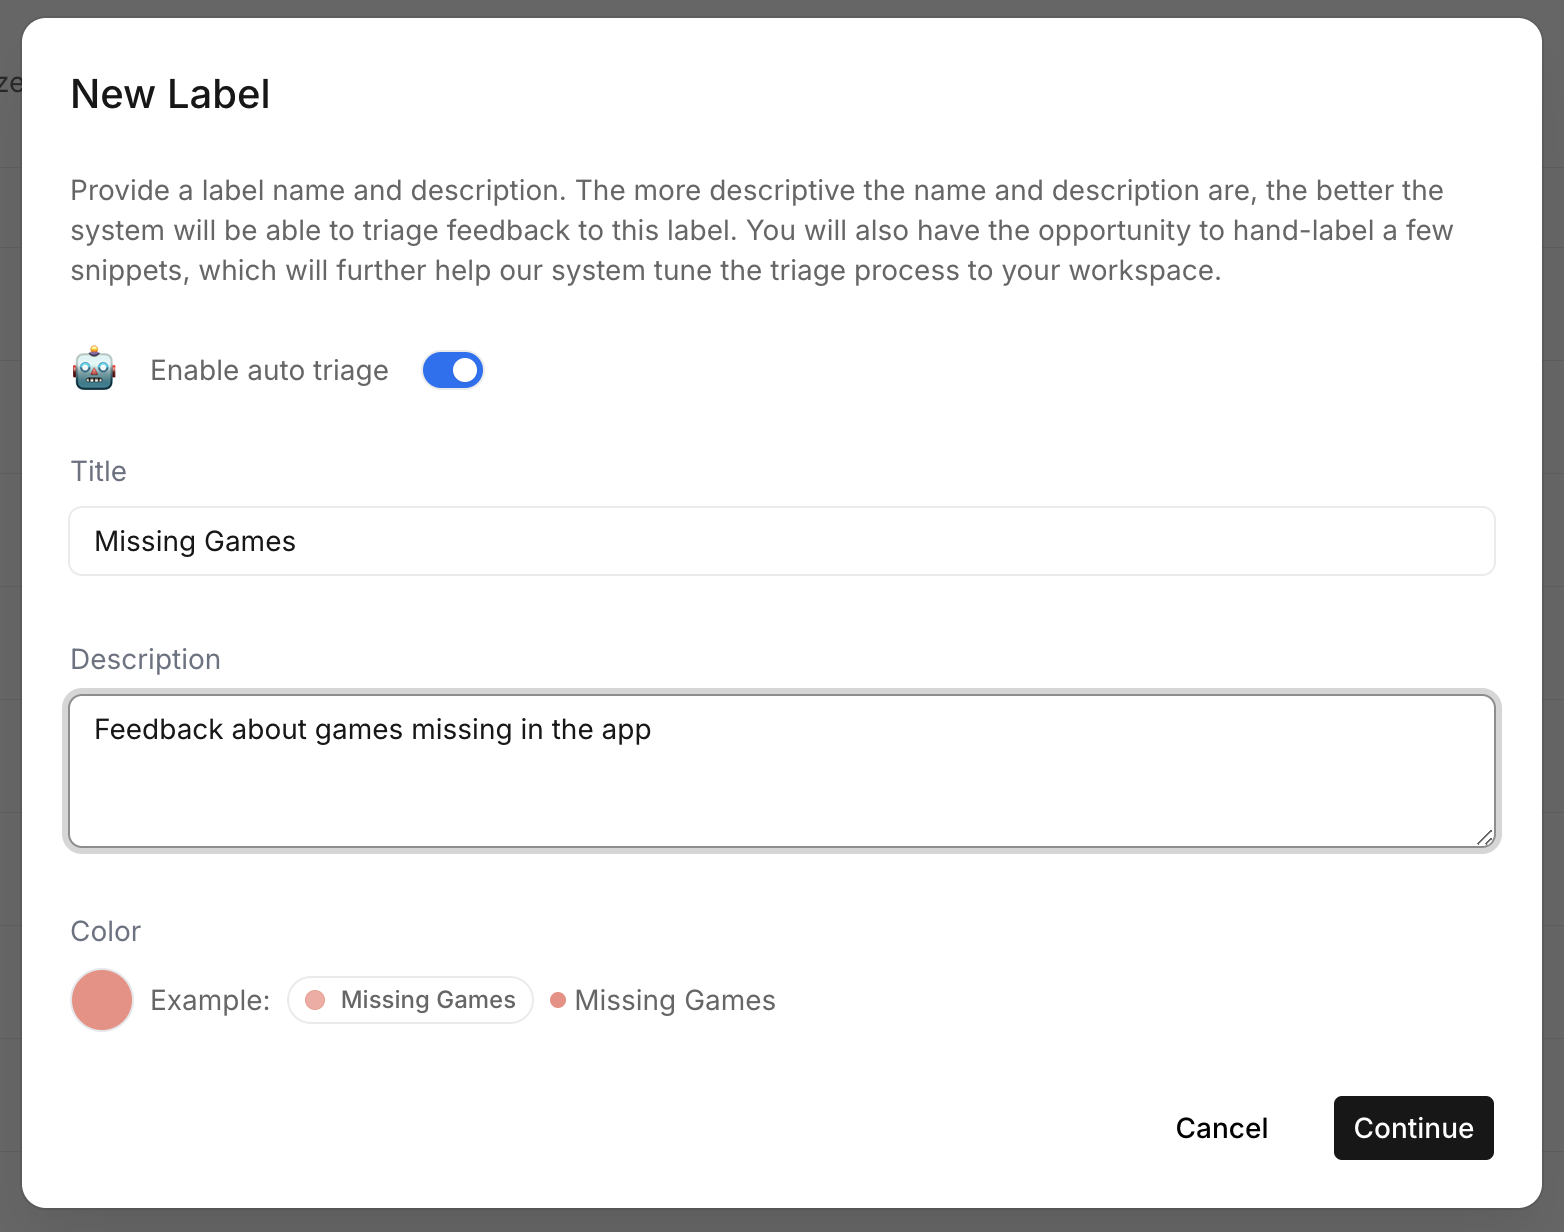
Create/Update Label: Descriptors
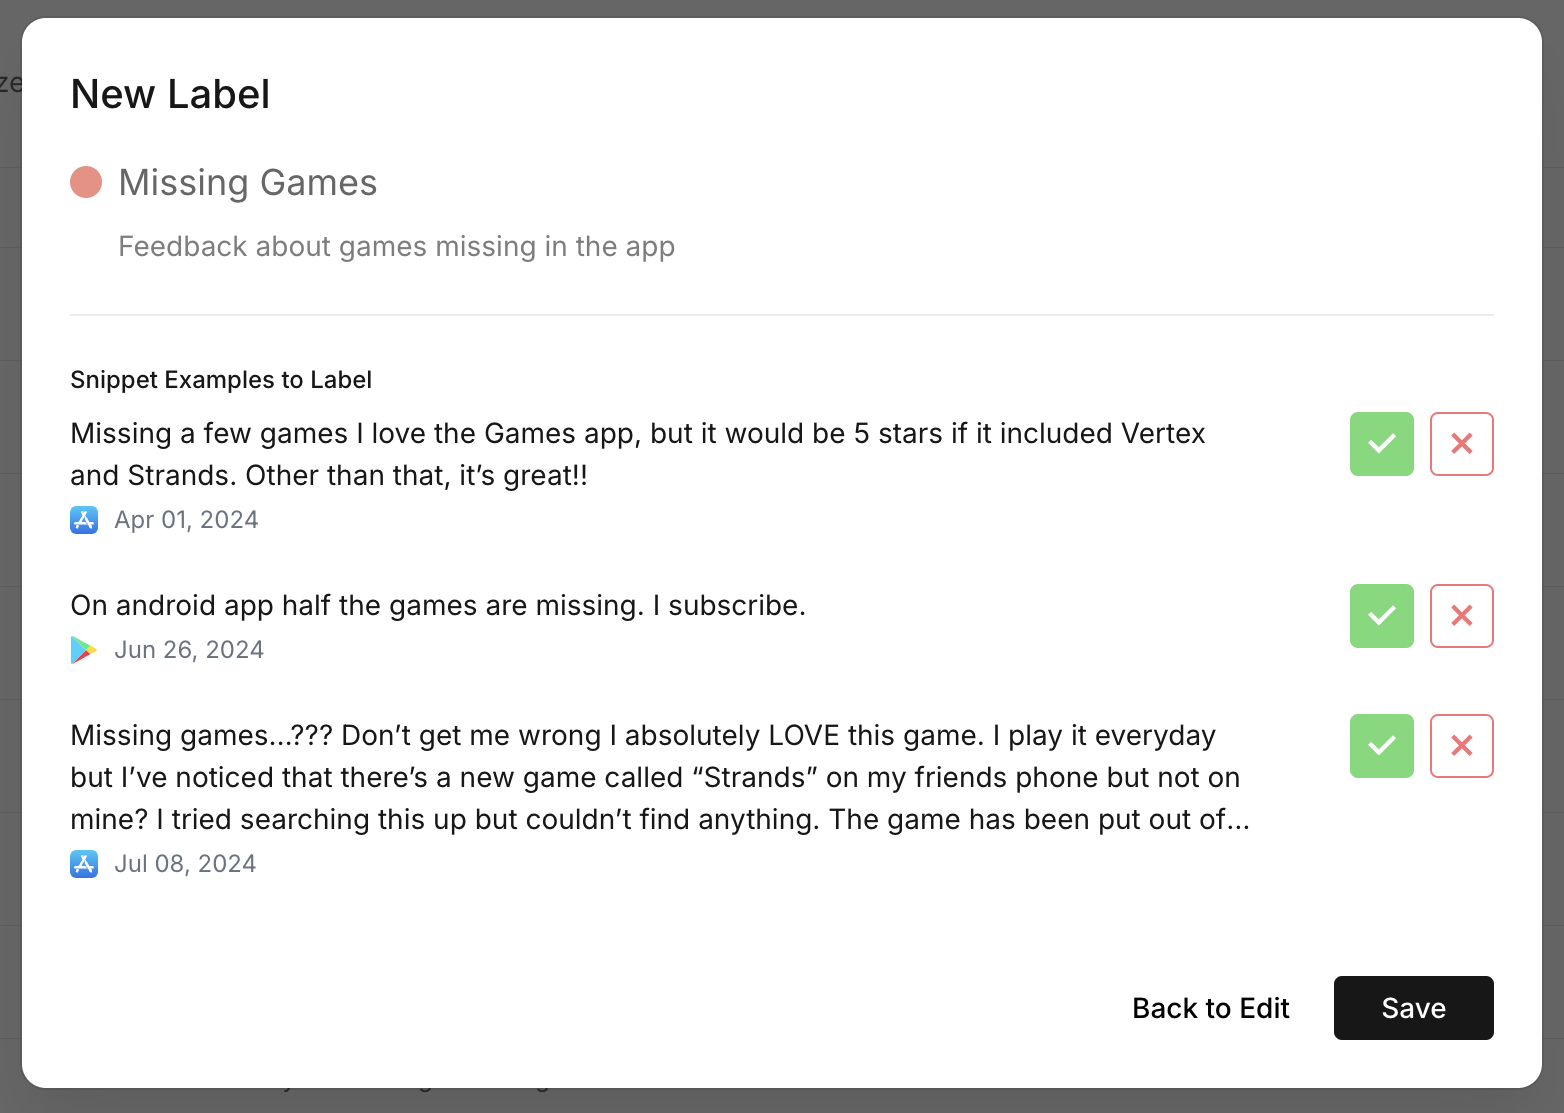
Create/Update Label: Snippet Examples
Labeling Feedback Snippet Examples
The second tab in the “Project Areas” or “Tags” page will be labeled Collect Label Examples. This tab is a dedicated view for collecting human labels on snippets that were not able to be auto assigned a label upon ingestion or backfill. The list of snippets is ordered such that the snippets that would provide the most value to our model as examples are placed at the top. When selecting a new label or set of labels for a snippet, you may see some label options include an “AI suggestion” indicator. This indicator states that while we were not confident enough to auto-assign this label, we think it’s still pretty likely this is the correct label. As these suggestions are confirmed or rejected with human labels, are models will become more confident in it’s predictions over time.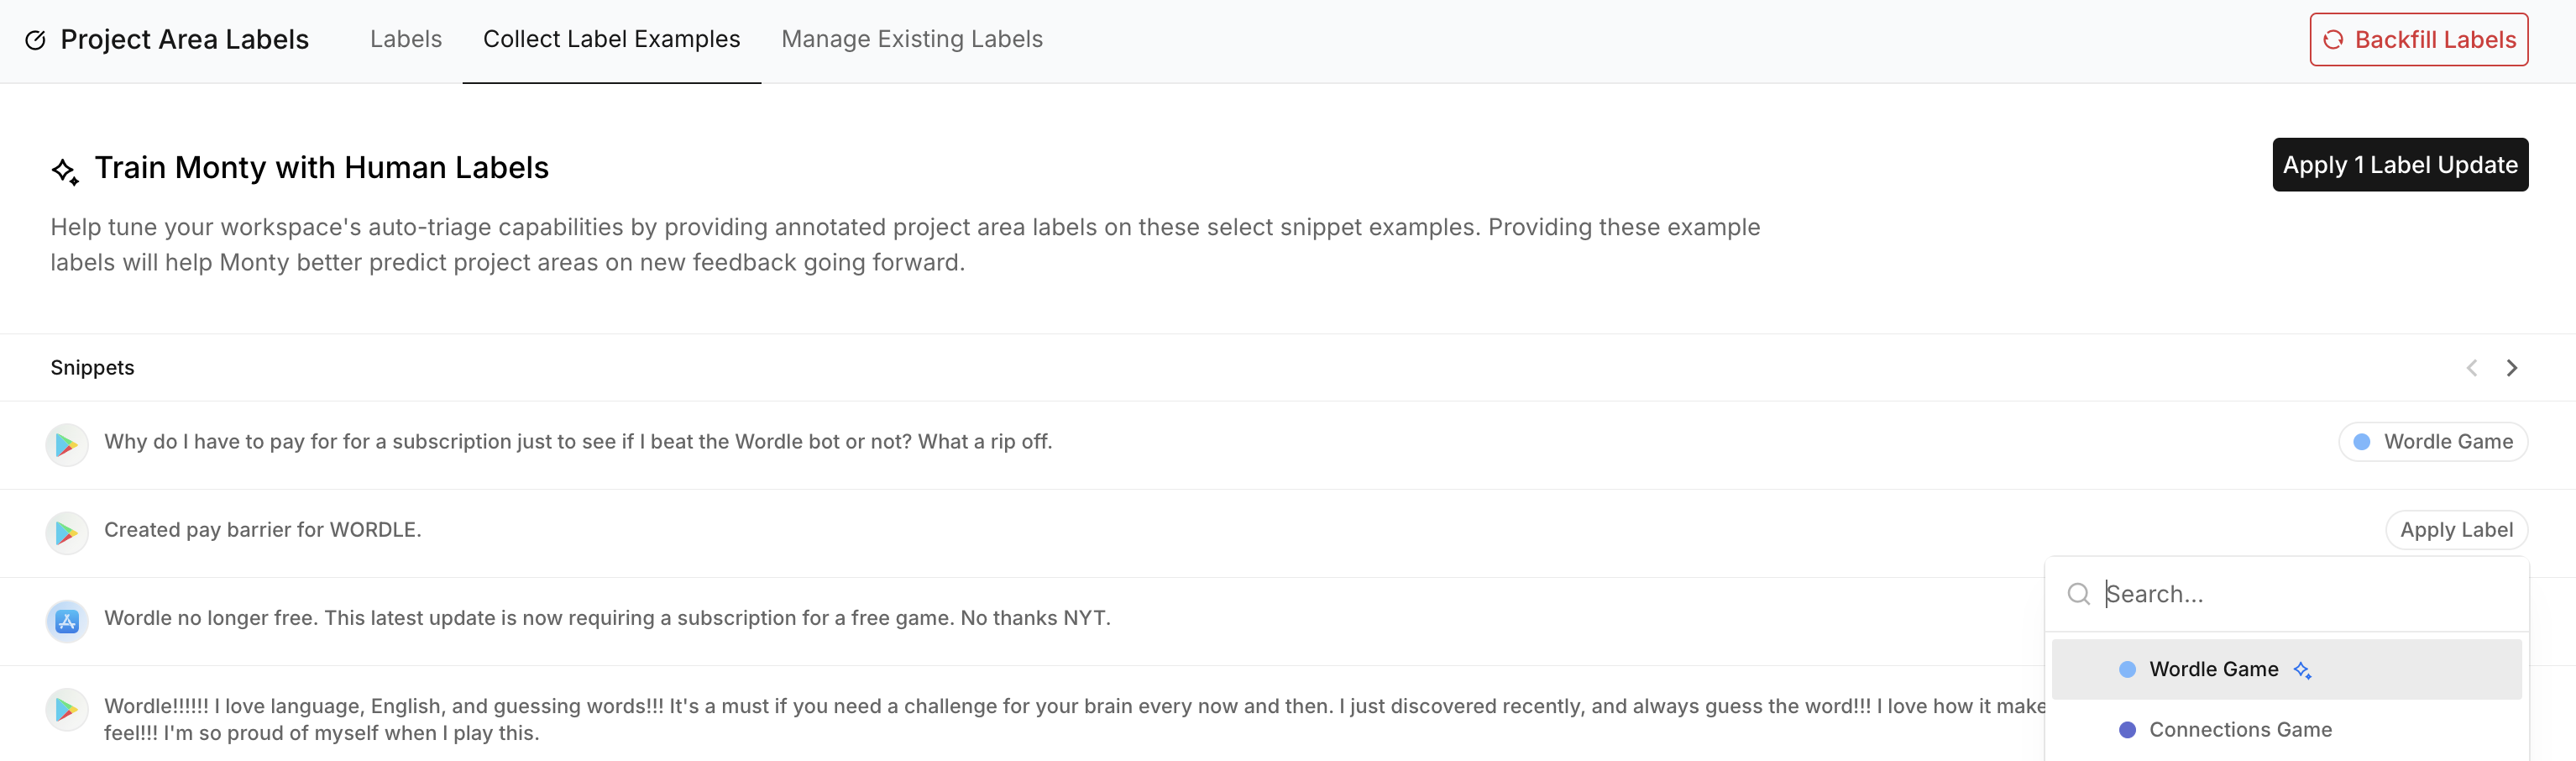
Collecting Human-Labeled Examples
Managing Existing Human Labels
The third and final label management tab is the Manage Existing Labels tab. This tab is dedicated view for viewing and updating all existing human-applied label assignments. These are helpful for seeing how existing snippets have been labeled, which will affect downstream auto-triage. Additionally, if a label is changed substantively, it would be prudent to find all human labeled examples for that label and update as needed.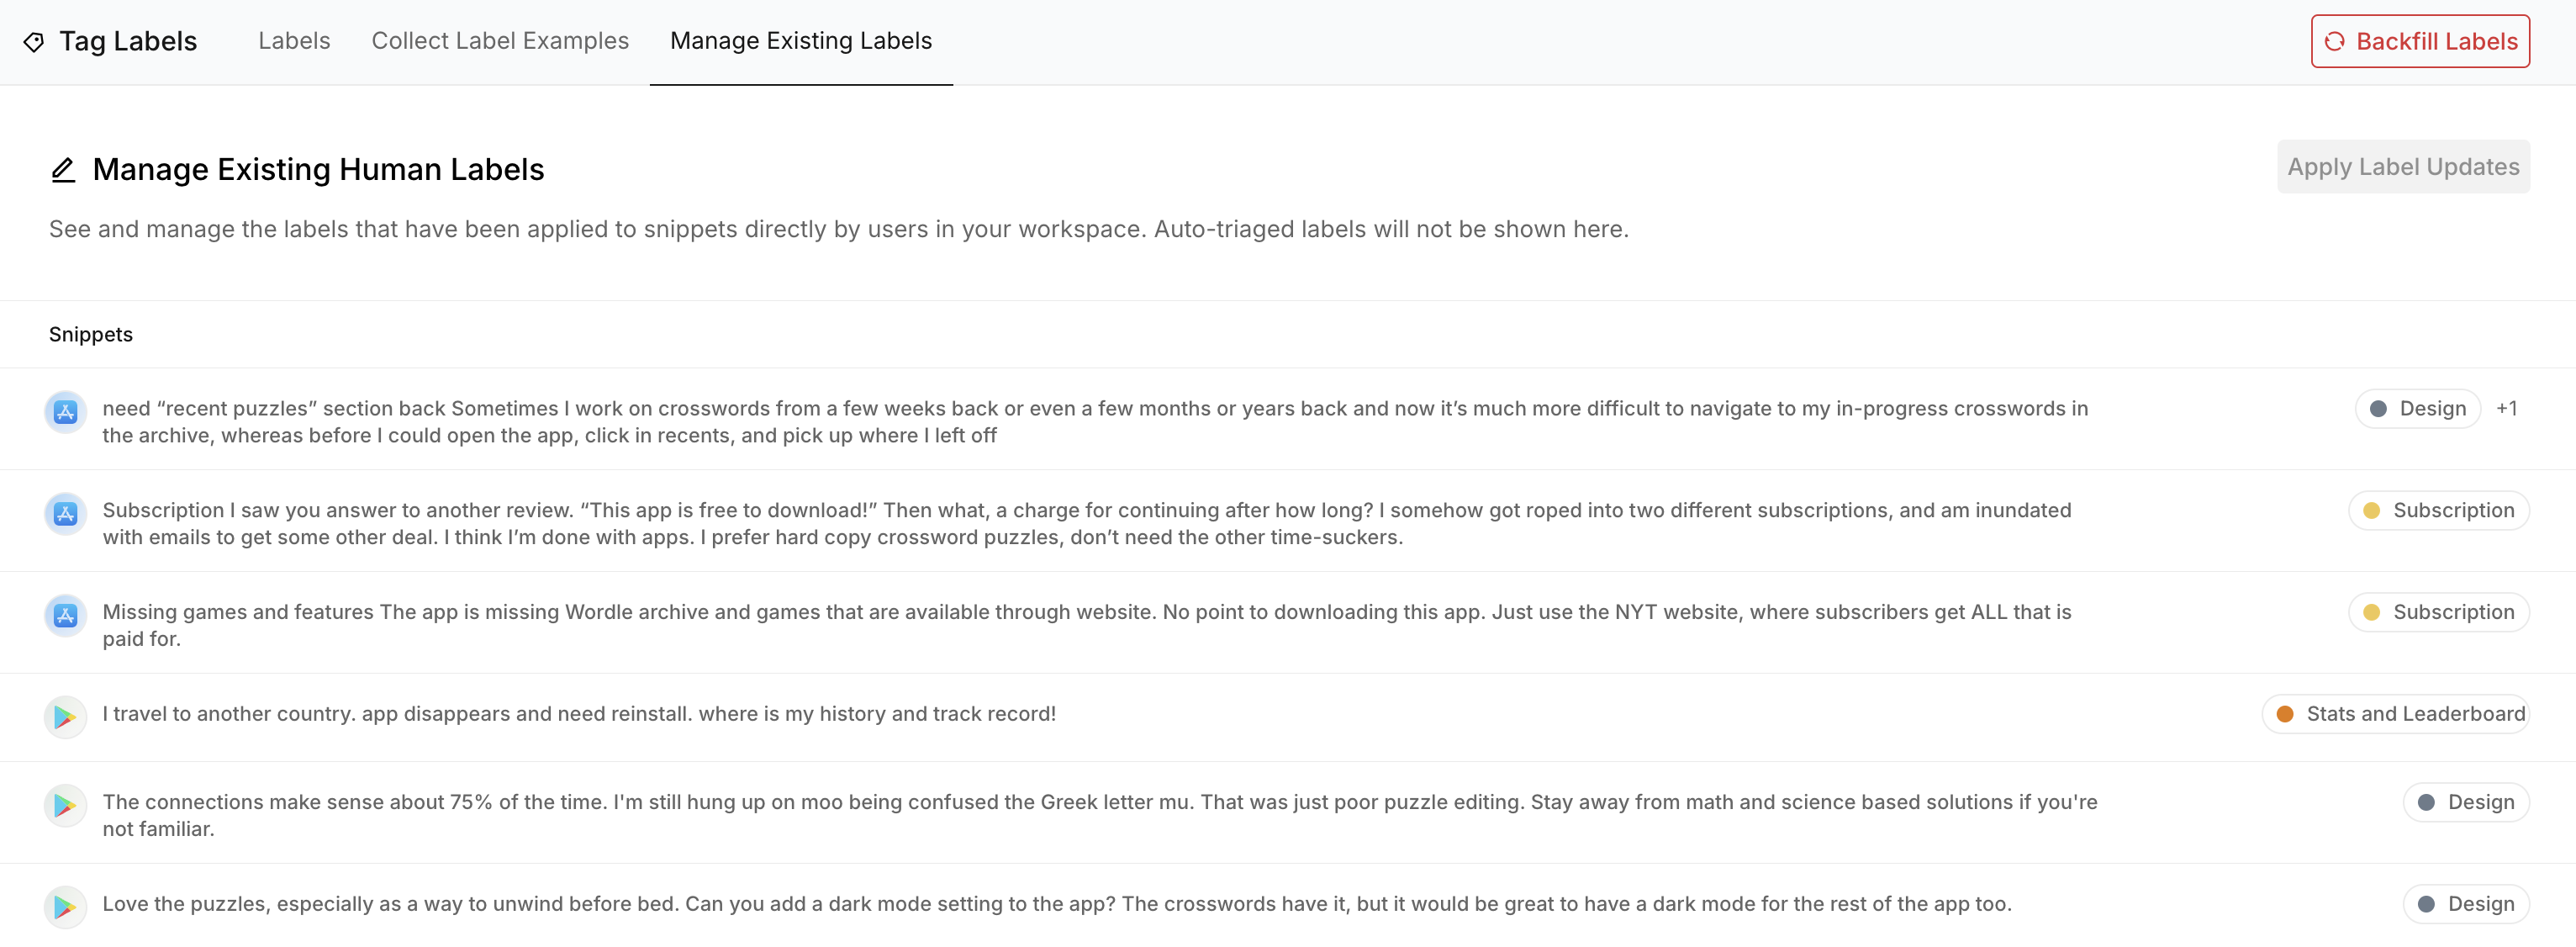
Managing Existing Human Label Examples
Label Backfill
The final action you will find in the label management pages is the Backfill Labels button in the top-right. Clicking this button will run labeling auto-triage across all unlabeled snippets in your workspace. You may want to run backfill if:- You have added and/or removed labels, or substantively updated label titles/descriptions
- Applied, removed or updated any human labels