
Overview
Salesforce unifies sales, marketing, and customer data on a single platform. Connect this data with Reforge Insights to find more insights, and link feedback back to real customer value.Get Started
You can find the Salesforce integration on your integration settings page. A user with access to both Reforge Insights as well as Salesforce will need to authorize the connection.1
Go to "Settings"
2
Click "Integrations" in the navigation menu
3
Click "Salesforce"
4
Click "Connect"
5
If necessary, log in to Salesforce using the appropriate account
6
Review and approve the permissions requested
7
Once confirmed, you will be returned to Reforge Insights, where you can toggle on ingestion of sales notes
Advanced Configuration
Configuration Sections
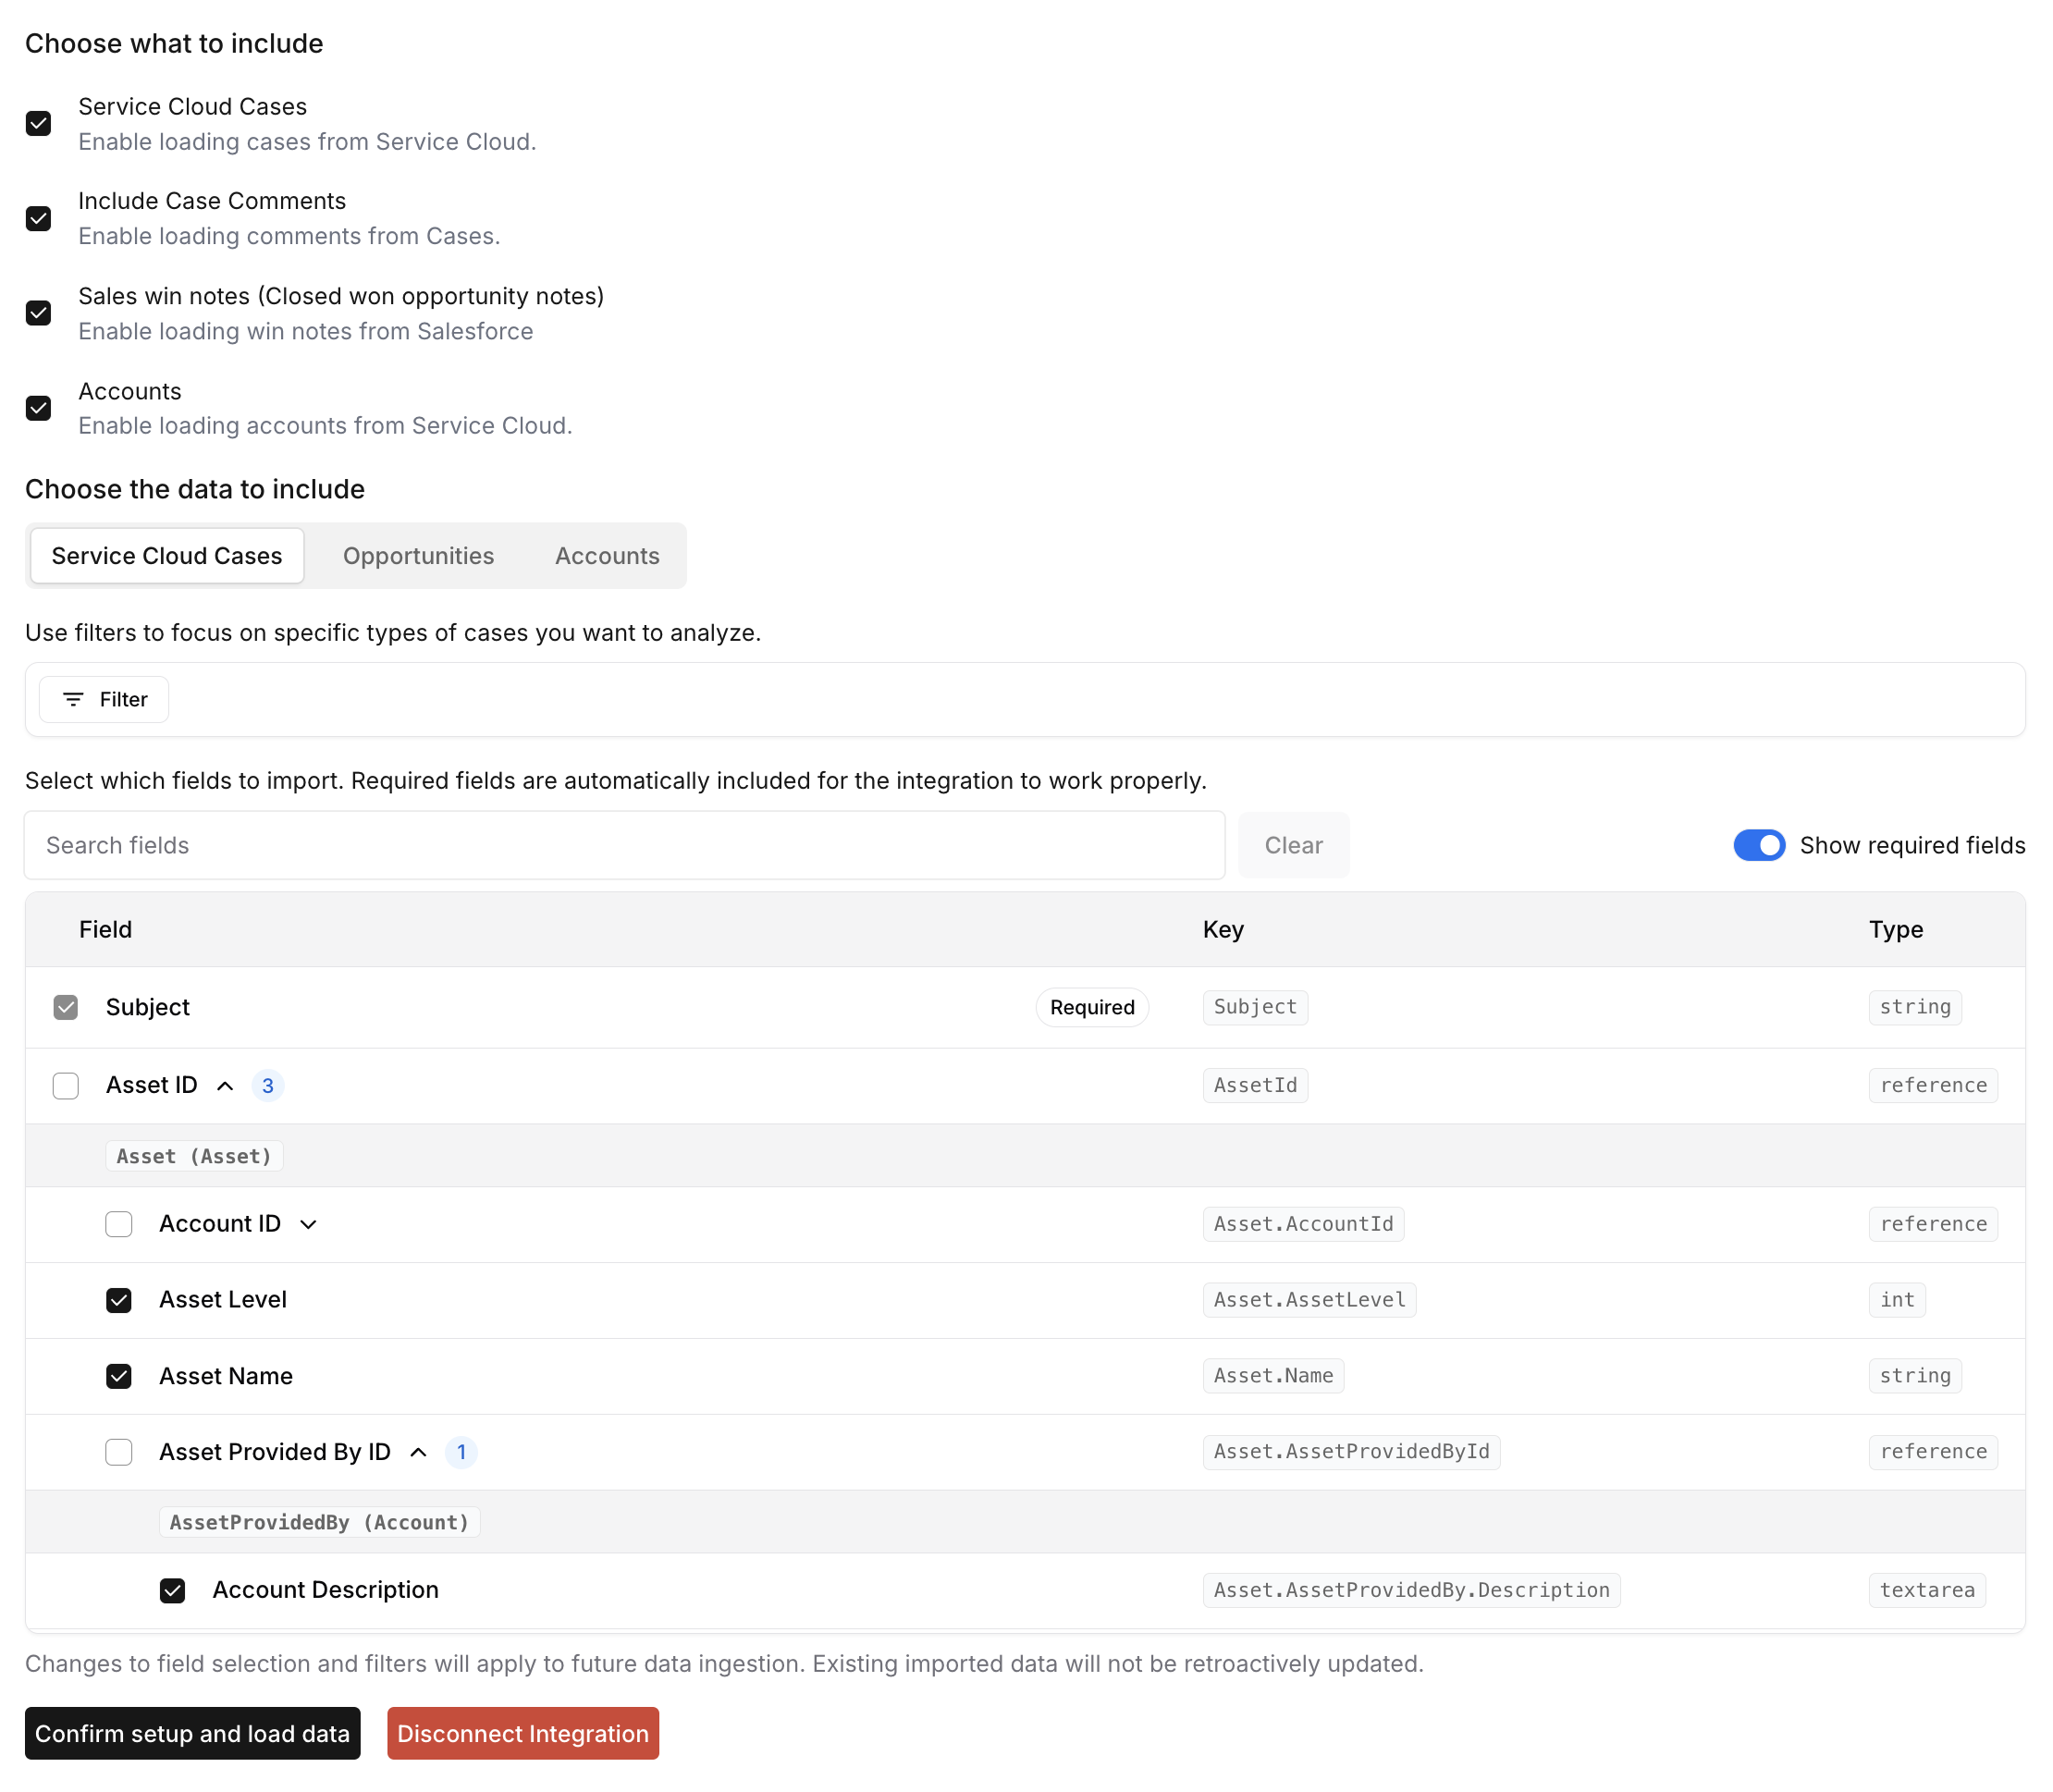
1. Choose What to Include
The Salesforce integration supports importing multiple data types independently:Service Cloud Cases
Enable loading cases from Service Cloud. This includes support case information and related contact details.Include Case Comments
Enable this option to import comments associated with cases in addition to the case content itself.Opportunities
Enable loading opportunities from Salesforce. This imports opportunity data and associated notes. You can use filters to specify which opportunities to include based on stage, amount, or other criteria.Accounts
Enable loading accounts from Service Cloud. This includes company information and account details.2. Choose the Data to Include
Select which fields to import for each data type. The data is organized into tabs representing the different Salesforce objects that can be ingested. Each data type can be configured independently.Data Type Tabs
Service Cloud Cases
Support case information including subject, description, status, priority, and related contact details.
Opportunities
Sales opportunity data including deal information, stage, and associated
notes. Use filters to specify which opportunities to include.
Accounts
Company and account information including contact details, revenue data, and custom account fields.
3. Narrow Down Your Data
Use filters to focus on specific records you want to analyze. Each data type can be filtered independently based on its own fields.Filtering is applied separately to each data type. You cannot filter cases
based on account fields, or opportunities based on case fields. Each object
type is filtered using only its own field values.
Filter Types and Operators
Different field types support different filtering operators:String Fields
String Fields
Available Operators:
contains- Field contains the specified textdoes not contain- Field does not contain the specified text
- Subject contains “billing”
- Description does not contain “resolved”
Number Fields
Number Fields
Available Operators:
is- Field equals the specified numberis not- Field does not equal the specified numberis greater than- Field is greater than the specified numberis less than- Field is less than the specified numberis less than or equal to- Field is less than or equal to the specified numberis greater than or equal to- Field is greater than or equal to the specified numberis empty- Field is emptyis not empty- Field is not emptybetween- Field falls within the specified range
- Priority equals 3
- Satisfaction score is greater than 4
Date Fields
Date Fields
Available Operators:
between- Field falls within the specified date rangeis empty- Field is emptyis not empty- Field is not empty
- Updated date range between 2024-01-01 and 2024-02-01
- Created date is empty
List Fields
List Fields
Available Operators:
is- Field is any of the specified valuesis not- Field is not any of the specified valuesis empty- Field is emptyis not empty- Field is not empty
- Tags is “urgent” or “billing”
- Status is not “closed” or “solved”
Boolean Fields
Boolean Fields
Available Operators:
is- Field matches the specified boolean value (true/false)is not- Field does not match the specified boolean valueis empty- Field is emptyis not empty- Field is not empty
- Is public is true
- Has incidents is false
Multiple Filters
When you add multiple filters, they are combined using an AND operator. This means tickets must match ALL filter criteria to be imported.4. Field Selection and Reference Drilling
- Required Fields
- Reference Field Drilling
- Custom Fields
Fields marked as Required are essential for the integration to function properly and cannot be deselected. These fields include:
- Service Cloud Cases:
Id,Subject,Description,AccountId,LastModifiedDate,CreatedDate,Contact.Id,Contact.Phone,Contact.MobilePhone,Contact.Title,Contact.CreatedDate,Contact.LastModifiedDate,Contact.Name,Contact.Email - Opportunities:
Id,AccountId,StageName,CreatedDate,LastModifiedDate,Description - Accounts:
Id,Name,Description,LastModifiedDate,CreatedDate
Preselected Fields: Beyond the required fields, we automatically preselect additional commonly used fields to help you get started quickly with meaningful data. These preselected fields include useful metadata like case status, account revenue information, and contact details that are frequently needed for analysis. You can deselect any of these preselected fields if they’re not relevant to your specific use case.
5. Custom Field Mapping
- Account Contract Value
For accounts, you can map a custom number field to represent the Contract Value. This allows you to: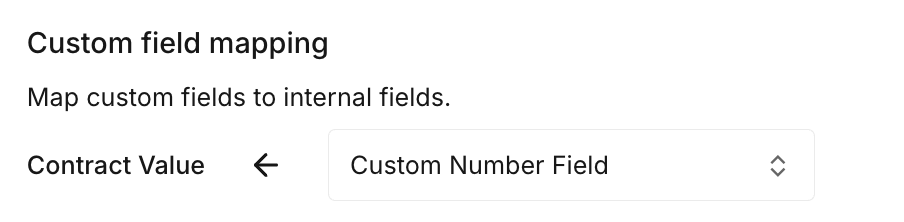
- Select from your existing custom number fields in Salesforce
- Map the selected field to the standardized “Contract Value” field in Reforge Insights
- Use this mapped value for account-based analysis and reporting
- Navigate to the Accounts tab in the data selection interface
- Locate the “Custom field mapping” section
- Select your desired custom number field from the dropdown
- The selected field will be mapped to “Contract Value” in Reforge Insights
Only custom fields of number type are available for Contract Value mapping to ensure proper numerical analysis.
Best Practices
Next Steps
After configuring your integration:- Test the configuration by triggering a manual sync
- Monitor the ingestion to ensure data is being imported correctly
- Review the imported data in your analytics dashboard
- Adjust filters and fields based on your initial results
- Set up automated workflows using the imported HubSpot data
Changes to field selection and filters will apply to future data ingestion.
Existing imported data will not be retroactively updated.
Data Collected
Once Reforge Insights and Salesforce are connected successfully, data will be pulled from periodically. The first time Reforge Insights loads data, it will look back 1 week. After that, it will ingest all new data up to your plan’s feedback volume limit. Each enabled data type (Service Cloud Cases, Opportunities, Accounts) will be ingested according to your configuration. You can use filters to specify which opportunities to include based on your specific needs and analysis requirements.Pricing Volume Impact
View the pricing page for more information on
how we calculate volume usage.
Common Issues
OAUTH_APP_BLOCKED The most common issue we see with connecting Salesforce is “OAUTH_APP_BLOCKED”. This is likely due to configuration in your Salesforce organization that restricts users from connecting new apps via OAuth. If you hit this error, please have a user with admin access in Salesforce complete the following steps: If you see an error like OAUTH_APP_BLOCKED when trying to install the integration, your Salesforce admin needs to allow access to the app.1
Go to Setup → Connected Apps OAuth Usage
You can search “Connected Apps OAuth Usage” in the Setup search bar.
2
Find "Reforge Insights" in the list
3
Click Manage next to the app name
4
On the next screen, click Edit Policies
5
Under Permitted Users, choose one of the following options
- Self-authorization (easier setup):Select “All users may self-authorize” → Save. You’re done.
- Admin-approved access (more control):Select “Admin approved users are pre-authorized” → Save. → Then scroll down and add the appropriate Profiles or Permission Sets under “Profiles” or “Custom Permissions” so your users can access the app.
6
Once updated, users can try the installation/authentication again